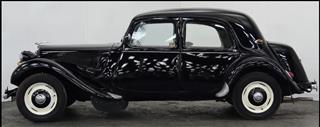
Improving the Speedometer Lighting on a Traction Avant
For post July 52 Tractions (Malle Bombe) like OSL 282 the Jaeger speedo is lit by 2 bulbs at the bottom with the light reflected up the case on the inside. On a 6v car they are 5 watt and on the Grey background it doesn’t make it easy to see what speed your doing in the dark/in a tunnel etc.
Now I did improve things but need you remove the speedo head from the car and take the glass off to get access to the display parts.
Getting it out means taking the steering wheel off, undoing the screws at the bottom left, under the speedo and the centre clip on the screen surround frame.
Once the head is loose from the frame you can pull the frame forward and off then you can then get access to the see the wiring to disconnect it (it’s colour coded so no problems putting it back) with a 7mm spanner/socket for the retaining nuts. I started with the ammeter and then the fuel gauge. Once you have room you can disconnect the speedo cable and pull out the 2 bulb holders. BTW it can be done without disconnecting the speedo cable at the gearbox as there is enough slack (on a small bodied car anyway) but if it's tight it takes 2 minutes to disconnect at the gearbox.
Once freed from the car the face with the speed number transfers actually comes apart with a minimal amount of effort. Once you remove the surround and glass and when you look at the rear face it’s simply alloy. That face is what the light bounces off to light up the display and whilst it may look OK after 62+ years mine did have some tarnish.
You can gently clean the actual face itself with something very mild, I used a hand wipe but be very careful as some chemical based cleaners react with the painted finish and will remove it! Now to the reflective face. Again be very careful and place it face down on a soft cloth so it doesn’t get damaged. Then using some Autoglym metal polish, you can clean it up to a mirror shine. It does take a bit of effort but DO NO USE any liquid solvent on it as it can track over onto the painted face and damage the finish.
Now when you reassemble (in reverse order) you can see where when it was originally built there were some ‘spacing’ pads (some shown in the image) which will have gone hard over the years. I replaced mine with some simple ‘Blue Tack’ as it is pretty inert, stays soft, will compress and hold and shouldn’t damage the coatings. Same applies to the glass which is spaced off the dial as well. Using the BlueTack should stop any of those annoying vibration noises you sometimes get as well.
Once you have cleaned the glass and refitted the seal and glass surround, tape around the outside the glass surround to the body to seal things up to stop any dust ingress. I used some canvas type cable tape, not vinyl, as it’s a lot like what came off when disassembling, if a different colour.
Now for those running or going to 12v then you can source 10 watt incandescent bulbs, but even those aren’t great so I decided to try and go to LED. Now they aren’t the cheapest out there at £14.69 a pair delivered, but Ring Filament Style LED – R10W 12V – 3000K do make an improvement even on a 67 year old car. (4k would have been whiter but I couldn’t find any). Now the LED’s are not ‘dimmable’ so I bypassed the resistor switch, with incandescent bulbs you can leave it in the system if you feel it’s distracting.
All told it took a couple of hours, but was worth the effort as I also replaced the fuel gauge which had never worked for 7 years, with a used one from LeBoncoin. Now I can see how much petrol is in the tank without having to work it out from the trip meter!
It may be possible to do something similar to brighten up an earlier Jaeger speedo head (black faced) but not having seen one close up can’t be certain.
Last Update: 15th June 2019

