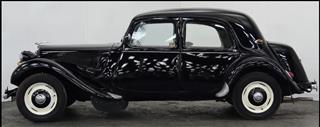

Traction Avant Rear Suspension RebuildAnother Reasonably straightforward job (for James anyway). January 2017 - Just over 4 years into the 'Rolling Restoration' and the last main mechanical job to be done on the 52 Traction Avant is the rear suspension 'silentblocs'. Some specialist tools are needed for the work so once again James Geddes at Traction Repairs is doing the work. To replace the actual silentblocs the rear axle trailing arms need to come out, be stripped down, checked, cleaned and the 'silentblocs', rubber bushing and anything else needs to be replaced. I opted to buy new height adjusters, nuts and retaining clips as well to speed up the work. However as the rear shock absorbers were replaced in 2013 it was decided to not replace those. Image 1 above shows where the Silentbloc bushes are located on the car. Image 2 shows the parts which are to be changed and image 3 shows the job started by jacking the rear of the car off the ground. There is no need to remove the whole axle assembly to replace the silentblocs as you can unbolt the housing units and they come off with the trailing arms as can be seen in the exploded parts diagram. First though you need to remove the road wheels, brake drums, shoes and backplates, disconnect the panhard rod and then the stub axle shaft. Image 1 above shows the trailing arms and torsion bars in place on the car, image 2 shows the unit removed and after 60+ years nothing was going to simply unscrew so image 3 shows heat being applied, rather generously... Image 1 above shows the 1st of the special tools in use to remove the silentbloc retaining nuts, image 2 shows the 1st one removed and image 3 the stripped, cleaned and painted trailing arms along with the new silentblocs in the housings ready for re assembly. Image 1 above shows the special jig required to set the housing and silentbloc angles prior to sub assembly, image 2 shows the 1st silentbloc being fitted and the 3rd image the 1st trailing arm set up. Image 1 above shows a completed trailing arm ready to be reinstalled. Reassembly is basically a reverse of the dismantling. Image 2 shows the completed assembly back in the car. October 2017 - Adjusting the weight Distribution When the rear suspension was rebuilt James set the 'ride heights' to the tolerances specified in the Workshop Repair Manual however the opportunity arose to carry out a 'Weight Distribution' check using a set of scales normally used for setting up race cars! The workshop manual is quite specific when it says 'THE LOAD DISTRIBUTION OF EACH WHEEL IS OF GREAT IMPORTANCE IN THE MATTER OF ROAD HOLDING, BRAKING AND TYRE WEAR' and 'Load distribution is of greater importance than body heights under the hull' It ended up at 8kg difference across the front and 6kg across the back as shown in the image on the right so whilst not entirely balanced well within tolerance. Now no figure is given for front to rear weight distribution however given all the weight of the engine and gearbox at the front of the car, a load difference of 11-12% front to rear doesn't seem to be not far off at all for a 65 year old Car:) Last Update: October 2017 |
|
OSL282