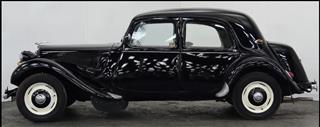

Traction Avant Front Suspension OverhaulFront Suspension The next job was to overhaul the front suspension and replace the 'Silent Blocks' but that is major work and James Geddes is once again going to do that as specialist tools and a minimum '10 Tonne' press is required. Why change the Silentblocs? Well you can see in the picture on the left below that the nearside one is badly perished with the rubber broken down, the new ones waiting to be fitted are shown on the right. I bought the complete kit including the 4 Silentblocs, new splined shafts, shims and bump stops from Jose Fransen. Just waiting for James now.
Due to other jobs overrunning, it wasn't until the beginning of June 2016 that the work was started by James. .jpg)
On stripping out the front suspension 'cradle' the ball joints for the steering hubs were found to be still in good condition after the work carried out on them 3 years ago. However both inner 'cardan' (drive shaft joints) had some play in them so will be replaced with good 2nd hand ones, plus the steering rack is in poor condition so a refurbished unit will also be fitted. Another problem was also found, the left side lower suspension arm looked as though it may be bent. It was only when the cradle was rebuilt and a straight edge was put through it could be seen properly so a 2nd hand arm was sourced to fit and replace the bent one. How it actually got bent is lost in history and could have happened anytime in the past 64 years!
Once the cradle was out of the car it was stripped down cleaned and painted, as shown in the images above. Then the cradle Silentblocs and lower arms are fitted, and checked to ensure the arms are straight. That's when the bent arm was deemed to be to far out of line and a replacement sourced, however that did mean having to use the press again.
Rebuilding the steering hubs is a slow process as the top and bottom swivel joints have to be 'shimmed' up to get the correct fit and once done, the top wishbone arm pin also needs to be shimmed up. In this case due to wear on the outer face of the wishbone bush, James had to have 0.10 mm machined off the right side pin before that side could be fitted and shimmed properly.
A big thank you to James Geddes of 'Traction Repairs' for getting the front suspension back to Factory Specification and my wife for understanding the money had to be spent..... Since July 2016 and shortly after the suspension rebuild, the car has occasionally pulled to the right when braking at low speed, then gradually gotten worse. The suspect was the right side front brake cylinder so I sourced a new one from 'Claude Renel' in France ready to swap over. Because of the special tools required I felt it easier just to let James Geddes change it for me (plus I don't like working in cold garages any more!)
This time it only took 1.5 hours to do the repair so really was a quick fix. Without the special drum puller (which cost more than double what James charged to do the job) it would not have been possible for me to do the work anyway. Last Update: 1st February 2017 |
|
OSL282